MorpHex Project – Morphing Hexapod – By Kåre Halvorsen – 81020
DESIGNED BY :
MorpHex Leg Design (November 30 2010)
To make Morphex being able to curl up into a ball shape, I’ve decided to go for a little special leg design. Actually, MorpHex is a sort of dual hexapod, where one leg share a common coxa part with two femur and tibia parts.
I’m using standard SES brackets, but pay attention to the ASB 15 v2 bracket that holds the two femur servos. The v2 bracket is just perfect for attaching the ASB-04 coxa bracket.

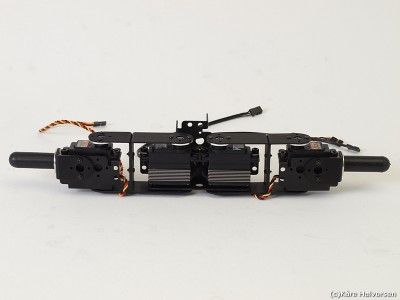
5990′s are used for the femur and 5645′s for the tibia and coxa.
Notice that the 5990 wires are guided through the 8 mm bearing/SES hole between the ASB-15 v2, LPA lexan spacer and the ASB-04 coxa bracket.
Body modifications
Since my first post about this project I’ve replaced the outer body parts from 1,5 mm to 2 mm thick aluminium, mainly for increased strength and stability (less flexing):
Making sure that every gear is aligned correctly was the hardest part when assembling the body section. I solved it by carefully placing one gear at the time and mark the 4 SES holes on each outer bodysection, remove the section, drill the holes and mount the section onto the inner body section again. Repeated this process for all the 6 sections.


Instead of using 3mm steel hex screws for holding the 12 ball-bearings onto the inner body I’m using 3mm threaded rods. The rods make it much easier for mounting a holder for battery and electronics.

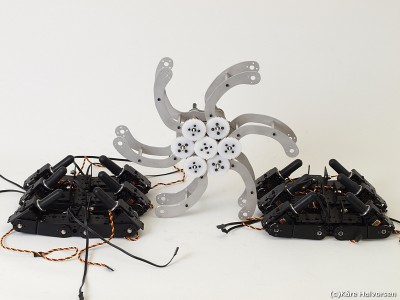
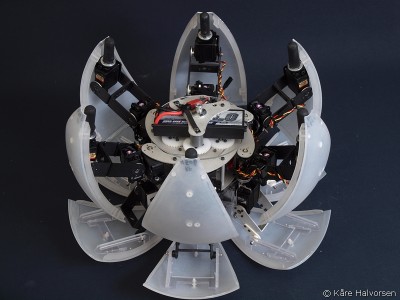
MorpHex, taking form
I know it looks kinda messy right now, but I do have plan, LOL. This picture show all legs mounted to the body and the upper part have their legs curled up into the ball shape position.


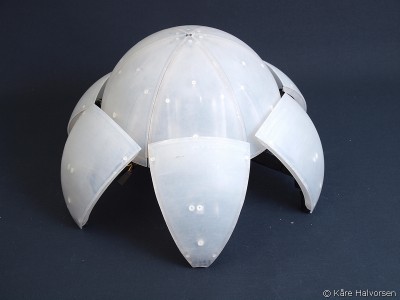
I’ve fixed some sphere parts with velcro just for giving you a little hint of how MorpHex are going to look like with all the sphere parts mounted:

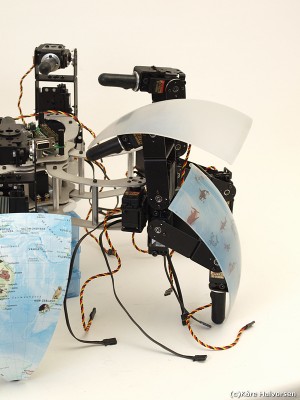


New pictures of MorpHex (March 27 2012)
To day I got some time to take some new photos of MorpHex.
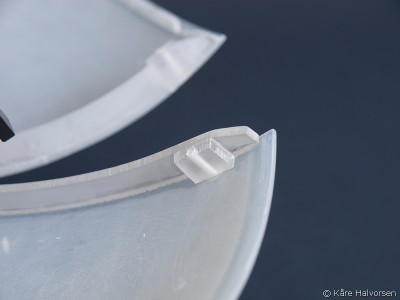
After my last post I found it necessary to some additional improvements, like strengthen the ribs on the lower sphere sections:
The solution was pretty simple; just a little piece of PC glued to the rib and a 3mm nylon screw for extra strength:

I’ve also done some small changes to the battery holder, relocated the main switch and mounted a plastic band to keep the battery wire as close to the body as possible:
Also pay attention to the main fuse. When dealing with LiPo’s directly connected to the main board its always a good idea to use fuse for limiting the max current in case of an accidental shortcut. In this case we don’t want a great ball of fire..
For replacing a battery I need to remove a 3mm hex screw. Then just slide out the battery and replace it:


The battery are fixed in place by a 3mm hex screw mounted on each end of the bottom plate. I don’t want a loose battery in “rolling mode”..
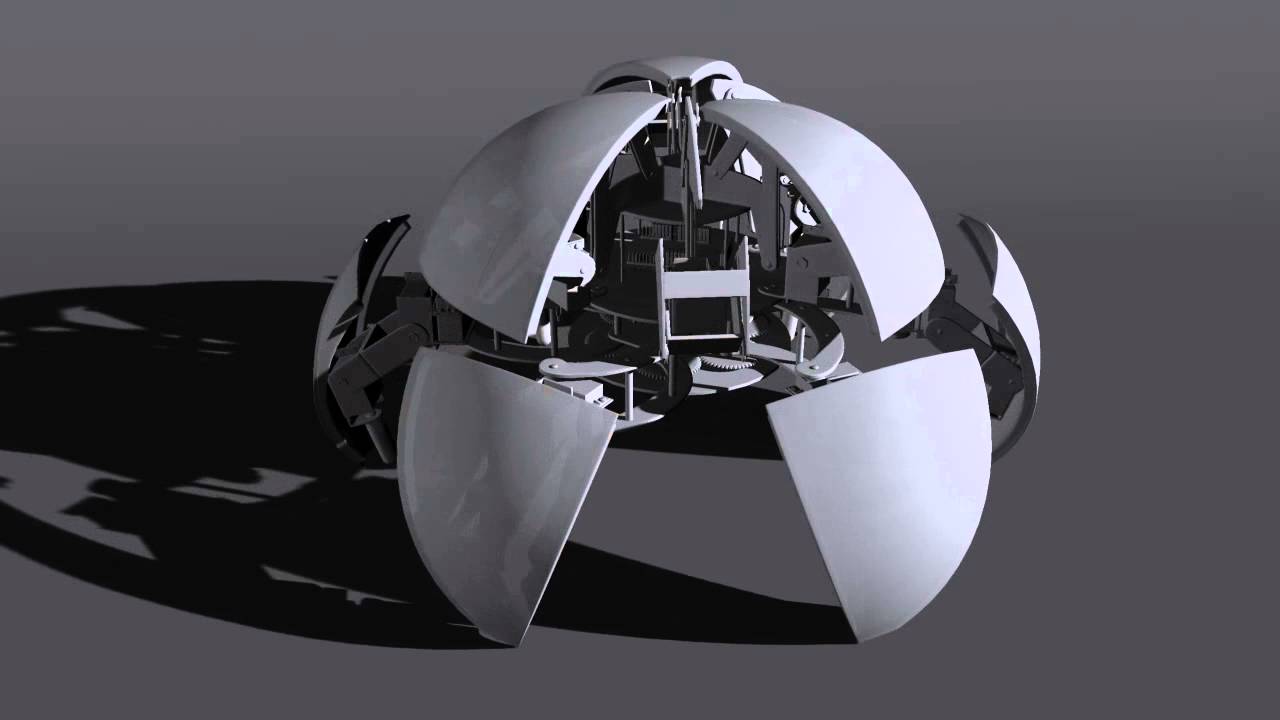
These two pictures demonstrate the effect of having an expanding body.
Closed body (Left Picture) Expanded body (Right Picture)

Expanded body and Some more pictures of MorpHex in different poses: